HOW TO CREATE AN AERISH ACADEMY ACCOUNT
This tutorial is designed for you, as an admin, to help school staff create their first account on the Aerish Academy website. Follow the steps below to create a user account and access the Aerish Academy website:
1. Click the account icon on the left side under the “Users & Access” section.
2. Alternatively, you can do this from the dashboard by selecting “Add User” under “Quick Actions".
3. Then click the blue “Add Account” button located in the top-right corner.
4. Then, fill in all the user data for the account you are creating correctly and carefully, making sure nothing is missed or left blank.
5. Username: In this section, enter the user’s real name to be used on the Aerish Academy website and ensure the username has not been used before.
6. Email address: Enter a valid email address and ensure it is active, as it will be used for verification or to reset the password.
Example: [email protected]
7. Phone number: In this section, the country code for Indonesia is automatically set to (+62), so enter the number starting with 8 instead of 0.
Example: (+62)8100xxxxxxx
8. Next, ensure the user’s phone number you have entered is still active.
9. Select group: This is an important step you must pay attention to when assigning the role for the user whose account you are creating.
10. Select or check one of the 12 roles based on the user’s position or role for the account you’re creating.
11. If the user for whom you are creating an account is a teacher at a school, then check the “Teacher” role in the “Select Group” step.
12. Status: After that, click the “Active” status so that the registered user can access the website according to their role.
13. Create Password: Create a password for the user that will be used to log in to the Aerish Academy website.
14. Ensure the password is at least 8 characters long and must include at least one uppercase letter, one number, and one symbol such as: @, #, *, etc.
15. In addition to a manually created password, you can also generate a random password for the user, which will automatically be set as the initial password to be provided to the user.
16. If you choose to generate a random password, make sure you remember it and immediately send it to the user you’ve registered.
17. Double-check that all data is filled in correctly and there are no errors.
18. If everything is correct, scroll back up and click the blue “Save” button in the upper-right corner.
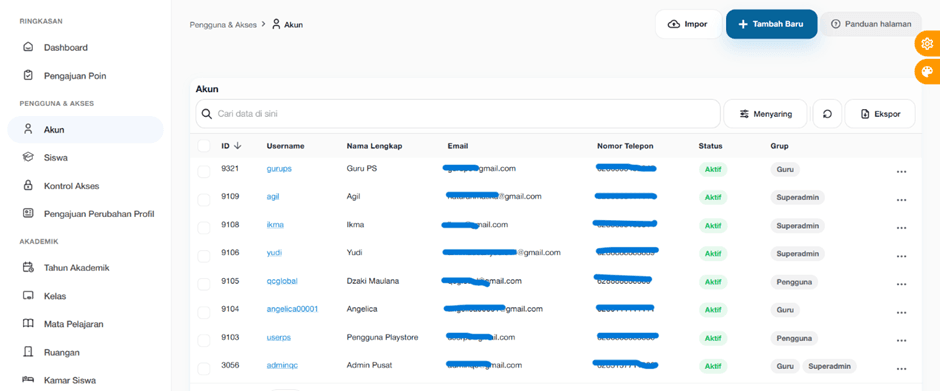
19. Once you’ve done it, make sure the account you registered appears on the website. To do this, click the account icon again and check the registered account name.
20. It will look like the picture below: